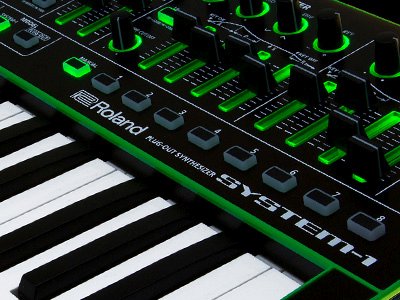
Help Desk: How to load Presets into Roland System-1
In this article you find a quick description, about how to load 3rd party presets into Roland System-1 synthesizer – for the VSTi/Cloud version, aswell as for the System-1 & System-1M hardware synthesizer.
LOADING THE SOUNDSET ON THE VST VERSION
Please make sure, you`re using the required plugin version (v1.14) or later!
Loading the soundset for the VSTi/Roland Cloud version is extremely simple.
[1] Click on the “Patch” button, then the patch window will open.
[2] There click on the “Load” button and then select the “CFA-Sound VECTOR-1 Soundset.bin” file.
BEFORE LOADING THE SOUNDSET TO SYSTEM-1 HARDWARE
REQUIREMENTS:
Please make sure, you`re using the required system version (v1.30) or later!
How to check the system version:
If you are not sure which system version is installed on your Roland System-1 / System-1M synthesizer (for example if you have not yet updated the system), there is an easy way to check the version number:
To quote the Roland Update Guideline:
[1] Hold down [KEY HOLD] button and [MOD] button, and switch on the power.
SCATTER TYPE “1” and the [ARPEGGIO] button flash.
[2] Press the [ARPEGGIO] button.
If the memory „3“ button is illuminated – v1.30 is installed.
If memory „1“ or „2“ button is illuminated, you need to update your system to version 1.30, in order to load and use the soundset.
Updates and the latest driver can be found here:
www.roland.com/global/products/system-1/downloads/
www.roland.com/global/products/system-1m/downloads/
[3] After checking version of the product, power off the SYSTEM-1 without performing any button operation. (in case you don`t need to update the system, otherwise follow the instruction on the Roland website for system update v1.30)
BACKUP YOUR PREVIOUS PRESETS:
Before loading any new presets to your System-1 hardware synthesizer, you should always backup your existing presets, otherwise they will get lost.
How to backup (quote from the users manual):
[1] Disconnect the USB cable from your System-1 as first step.
[2] Hold down „ARPEGGIO“-button and switch on the power.
[3] Connect your computer to the System-1`s USB port via USB cable.
[4] Open the „SYSTEM-1“ drive folder on the computer. (The System-1 will act like an usb storage in that mode, to allow backup and restore function)
[5] Open the „BACKUP“ folder and copy the System-1`s patch memory files into your desired folder.
System-1 Presets will be named like :
„SYSTEM1_PATCH1.PRM“ … „SYSTEM1_PATCH64.PRM“
Presets of PlugOuts will be named like:
„PLUGOUT_PATCH1.PRM“ … „PLUGOUT_PATCH64.PRM“
[6] After copying is completed, disconnect „SYSTEM-1“ drive folder from your computer and disconnect the USB cable.
WinOS – right-lick on „SYSTEM-1“ icon in „My Computer“ and execute „Eject“.
MacOS – Drag the „SYSTEM-1“ icon to the Trash icon in the Dock.
[7] Turn the System-1 power off.
LOAD PRESETS TO SYSTEM-1 HARDWARE – OPTION A
Probably the most comfortable way to load the presets would be via the System-1 VSTi. For all those who have the VSTi (previously available as a standalone VSTi, now only available via Roland Cloud subscription) – follow the steps of loading the soundset (bin format) for the VSTi. Then (if the MIDI control input & output settings for the connected System-1 hardware synthesizer are correct) simply click on “Send All” in the patch window. The presets are then transferred to the hardware synthesizer.
This method also works in the demo mode of the System-1 VSTi.
LOAD PRESETS TO SYSTEM-1 HARDWARE – OPTION B
If you don’t also have the System-1 VSTi version, you have to load the presets into the hardware synthesizer by using the restore function.
How to load via restore (quote from the users manual):
[1] Disconnect the USB cable from your System-1 as first step.
[2] Hold down „ARPEGGIO“-button and switch on the power.
[3] Connect your computer to the System-1`s USB port via USB cable.
[4] Open the „SYSTEM-1“ drive folder on the computer. (The System-1 will act like an usb storage in that mode, to allow backup and restore function)
[5] Open the „RESTORE“ folder and copy the System-1`s patch memory files (all RPM files from the folder „Soundset in RPM Format (Hardware)“ from the soundset zip archive into this folder.
System-1 Presets will be named like :
„SYSTEM1_PATCH1.PRM“ … „SYSTEM1_PATCH64.PRM“
[6] After copying is completed, disconnect „SYSTEM-1“ drive folder from your computer and disconnect the USB cable.
WinOS – right-lick on „SYSTEM-1“ icon in „My Computer“ and execute „Eject“.
MacOS – Drag the „SYSTEM-1“ icon to the Trash icon in the Dock.
[7] Wait until the „OCTAVE [DOWN] [UP]“-buttons have completely stopped blinking. After that, turn the power off.
Now you can power on your System-1 again, and use the presets.
In most cases our products (e.g. soundsets and presets packs) contain a detailed installation guide, if the presets based on the synthesizer, need to be placed in specific folders and of course, which version of the particular synthesizer is required to use the soundset files. Otherwise, the developer`s synthesizer manual always shows how its preset handling works and can be used.
If you have any questions left or if additional help and support are needed, feel free to contact us via our contact form or via our support forum on KVR.